갑자기 WPF를 사용해 프로그램을 만들고 싶었다.
아무 이유도 없이 WPF .NET Core 프로젝트를 만들고
디자인 적용을 시작해보았다.
디자인 근본 Material Design을 적용할 것이다.
Material Design 설치
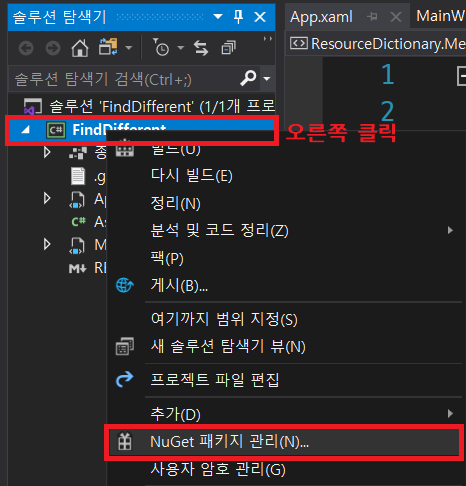
솔루션 탐색기 - "프로젝트 파일" 오른쪽 클릭 - NuGet 패키지 관리
이 때 나는 솔루션용 NuGet 패키지 들어가서 다운 받아 놓고 맞왜틀! 하고 있었다
프로젝트 파일에서 오른쪽 클릭해서 들어가는 지식인이 되도록 하자

NuGet 패키지의 찾아보기에
Material Design
을 검색한 뒤,
Material DesignThemes를 다운 받는다.
나는 이미 다운 받아 X표로 삭제 하는 것이 뜨지만
다운 하기 전이라면

마우스를 올렸을 때 모양이 떠 있을 것이다.
Material Design 적용
설치가 끝났다면 적용을 하자.
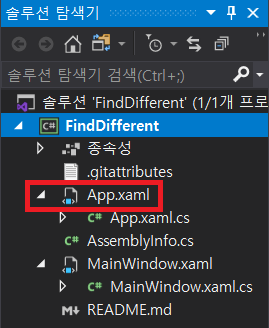
1. App.xaml
미래의 내가 위치 못 찾을 거 알기에
위치도 표시해준다.
x:Class="프로젝트이름.App"
xmlns="http://schemas.microsoft.com/winfx/2006/xaml/presentation"
xmlns:x="http://schemas.microsoft.com/winfx/2006/xaml"
xmlns:local="clr-namespace:FindDifferent"
StartupUri="MainWindow.xaml"
저기에 <Application>에 위의 코드를 넣고 끝에 /를 적으면 된다.
ex) <Application 위에 코드 복붙 />
다음은
<Application.Resources></Application.Resources>
둘 사이에
        <ResourceDictionary>
            <ResourceDictionary.MergedDictionaries>
                <ResourceDictionary Source="pack://application:,,,/MaterialDesignThemes.Wpf;component/Themes/MaterialDesignTheme.Light.xaml" />
                <ResourceDictionary Source="pack://application:,,,/MaterialDesignThemes.Wpf;component/Themes/MaterialDesignTheme.Defaults.xaml" />
                <ResourceDictionary Source="pack://application:,,,/MaterialDesignColors;component/Themes/Recommended/Primary/MaterialDesignColor.DeepPurple.xaml" />
                <ResourceDictionary Source="pack://application:,,,/MaterialDesignColors;component/Themes/Recommended/Accent/MaterialDesignColor.Lime.xaml" />
            </ResourceDictionary.MergedDictionaries>
        </ResourceDictionary>
위 의 코드를 넣으면 된다.
그렇다면 App.xaml은
<Application x:Class="프로젝트파일이름.App"
             xmlns="http://schemas.microsoft.com/winfx/2006/xaml/presentation"
             xmlns:x="http://schemas.microsoft.com/winfx/2006/xaml"
             xmlns:local="clr-namespace:FindDifferent"
             StartupUri="MainWindow.xaml">
    <Application.Resources>
        <ResourceDictionary>
            <ResourceDictionary.MergedDictionaries>
                <ResourceDictionary Source="pack://application:,,,/MaterialDesignThemes.Wpf;component/Themes/MaterialDesignTheme.Light.xaml" />
                <ResourceDictionary Source="pack://application:,,,/MaterialDesignThemes.Wpf;component/Themes/MaterialDesignTheme.Defaults.xaml" />
                <ResourceDictionary Source="pack://application:,,,/MaterialDesignColors;component/Themes/Recommended/Primary/MaterialDesignColor.DeepPurple.xaml" />
                <ResourceDictionary Source="pack://application:,,,/MaterialDesignColors;component/Themes/Recommended/Accent/MaterialDesignColor.Lime.xaml" />
            </ResourceDictionary.MergedDictionaries>
        </ResourceDictionary>
    </Application.Resources>
</Application>
이러한 형태를 보일 것이다.
2. MainWindow.xaml
이것만 수정하면 끝이다.
참고로 아래 사진의 XAML 팝아웃을 이용하면 편하다
미래의 나 자신

MainWindow.xaml에 들어가면
<Window x:Class="프로젝트이름.MainWindow"
        xmlns="http://schemas.microsoft.com/winfx/2006/xaml/presentation"
        xmlns:x="http://schemas.microsoft.com/winfx/2006/xaml"
        xmlns:d="http://schemas.microsoft.com/expression/blend/2008"
        xmlns:mc="http://schemas.openxmlformats.org/markup-compatibility/2006"
        xmlns:local="clr-namespace:FindDifferent"
        mc:Ignorable="d"
        Title="MainWindow" Height="500" Width="800">
이렇게 생긴게 있을 거다.
저기에 아래의 코드를 넣으면 된다.
        TextElement.Foreground="{DynamicResource MaterialDesignBody}"
        TextElement.FontWeight="Regular"
        TextElement.FontSize="13"
        TextOptions.TextFormattingMode="Ideal"
        TextOptions.TextRenderingMode="Auto"
        Background="{DynamicResource MaterialDesignPaper}"
        FontFamily="{DynamicResource MaterialDesignFont}"
이 코드 넣어라했다고, 기존 거 싹 지우고 넣으면 안되고
추가를 하자
<Window x:Class="FindDifferent.MainWindow"
        xmlns="http://schemas.microsoft.com/winfx/2006/xaml/presentation"
        xmlns:x="http://schemas.microsoft.com/winfx/2006/xaml"
        xmlns:d="http://schemas.microsoft.com/expression/blend/2008"
        xmlns:mc="http://schemas.openxmlformats.org/markup-compatibility/2006"
        xmlns:local="clr-namespace:FindDifferent"
        mc:Ignorable="d"
        TextElement.Foreground="{DynamicResource MaterialDesignBody}"
        TextElement.FontWeight="Regular"
        TextElement.FontSize="13"
        TextOptions.TextFormattingMode="Ideal"
        TextOptions.TextRenderingMode="Auto"
        Background="{DynamicResource MaterialDesignPaper}"
        FontFamily="{DynamicResource MaterialDesignFont}"
        Title="MainWindow" Height="500" Width="800">
대강 이런 형태일 것이다.
적용 끝!
Material Design Toolkit
디자인을 적용한 이유는
다른 사람이 만들어 놓은걸 뽑아먹기 위해서이다.
도구들을 뽑아먹을 툴킷을 설치하자.
https://github.com/MaterialDesignInXAML/MaterialDesignInXamlToolkit
위 링크로 이동해서
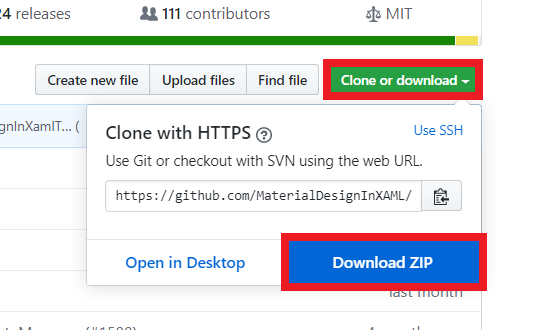
사진 처럼 ZIP 파일을 받고 멋지게 압축도 해제해주자
폴더에 들어가서 쭉 내리면
MaterialDesignToolkit.Wpf
이름을 지닌 친구가 있을 것이다.

저 친구를 실행시킨다.
실행시키면 뭔지 모를 무언가들이 좌악 있는데
겁먹지 말고,
Ctrl + Alt + f7 혹은
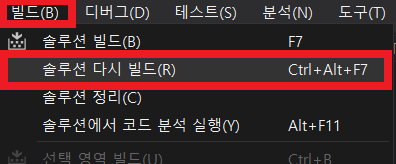
이것을 통해 솔루션 다시 빌드를 해준다.

뭔진 잘 모르지만 성공했다고 할 거다.
나는 Visual 2017로 빌드할 때는 실패했는데
2019로 할 때는 되었었다.
Core 뭐라뭐라 SDK 뭐라뭐라 버전이 뭐라뭐라 하던데 아무튼 난 됐다.
MaterialDesignInXamlToolkit-master\MainDemo.Wpf\bin\Debug\netcoreapp3.1
이 경로로 들어간다면
MaterialDesignDemo.exe
파일이 있을 거다.

실행해서 마음껏 사용하자
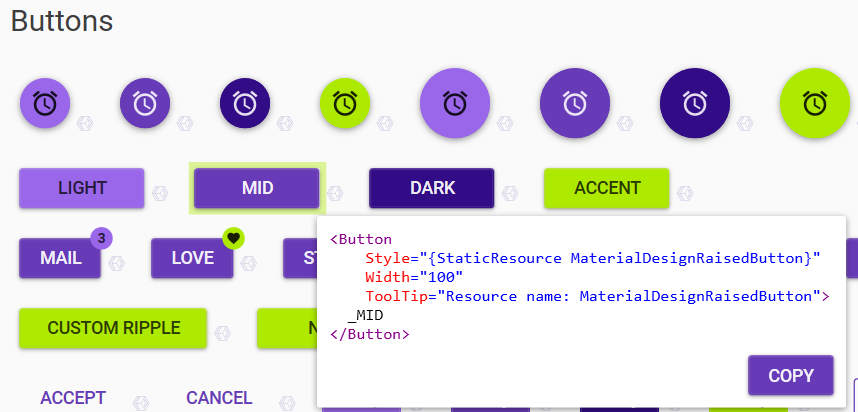
원하는 요소 근처에 보면 희미한 회색 무언가가 있는데
그걸 누르면 해당 코드가 나온다.
이 코드를 복사한 다음
MainWindow.xaml에
옮겨 적으면 원하는게 짠 하고 나온다.
'부장님의 이야기' 카테고리의 다른 글
| [Windows API] 윈도우 프로그래밍 개요 (0) | 2020.07.14 |
|---|---|
| [WPF] : Draw Shapes! 그림 그리기 (0) | 2020.07.09 |
| [WPF-Find Different] : #3 이미지 업로드 및 그리드 (0) | 2020.05.16 |
| [WPF-Find Different] : #2 마우스클릭 이벤트 (0) | 2020.05.14 |
| [Find Different] : #1 타이머 만들기 (0) | 2020.05.11 |


